

The Ultimate Guide to Preparing Text Data for Language Modeling with PyTorch
Master tokenization, Byte Pair Encoding, Sampling windows, and Embeddings

Introduction
When working with large language models (LLMs), one of the most crucial steps is preparing the textual data in a format that these models can understand and learn from. This process involves converting raw text into numerical vectors, known as embeddings, as LLMs cannot directly process plain text.
In this post, we'll take a deep dive into the techniques and best practices for text preprocessing and embedding generation using PyTorch, a popular deep learning framework. We'll cover everything from basic tokenization to implementing advanced algorithms like Byte Pair Encoding (BPE), creating efficient data sampling techniques, and building embedding layers from scratch. By the end, you'll have a solid understanding of how to prepare text data for training powerful language models. To explore the concepts further and see the code in action, check out the accompanying Colab notebook here and follow along with the step-by-step examples.
Let's get started!

Understanding Embeddings: The Bridge Between Text and Mathematics
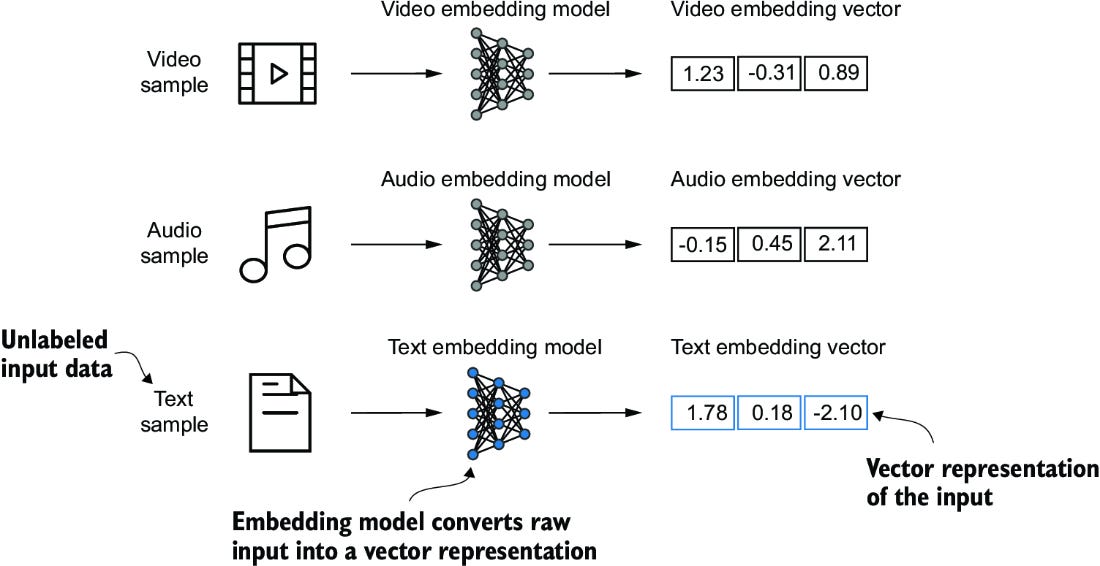
Before we dive into the technical implementation details, let's understand what embeddings are and why they're crucial for language models. Think of embeddings as a way to translate words into numbers – but not just any numbers. They're carefully crafted numerical representations that capture the meaning, relationships, and context of words in a way that computers can process.
What Are Embeddings and Why Do We Need Them?
At their core, embeddings are dense vectors (arrays of numbers) that represent words or tokens in a continuous vector space. When you feed the word "cat" to a computer, you can't just use the letters "c-a-t" - computers need numbers to perform calculations. An embedding transforms "cat" into a vector like [0.2, -0.5, 0.8, ...], where each number helps represent different aspects of the word's meaning.
What makes embeddings powerful is their ability to capture semantic relationships. Words with similar meanings end up having similar numerical representations. For example, the embeddings for "cat" and "kitten" would be more similar to each other than to the embedding for "submarine". This similarity can be measured mathematically, allowing models to understand relationships between words.

Modern embedding systems typically represent words in high-dimensional spaces. For example:
GPT-2 uses 768-dimensional embeddings for its smallest model
GPT-3's largest model uses 12,288-dimensional embeddings
BERT-base uses 768-dimensional embeddings
The real power of embeddings comes from their ability to learn from data. During model training, these embeddings are automatically adjusted to capture relationships present in the training data, adapting to specific domains and discovering nuanced patterns that might not be obvious to human designers.
Text Tokenization and Preprocessing Techniques
The first step in preparing text for LLMs is tokenization - breaking down raw text into smaller units called tokens. Tokens can be individual words, subwords, or even characters. The goal is to create a finite set of meaningful units that the model can learn from.

However, raw text often contains noise and inconsistencies that can hinder the tokenization process. These include:
Inconsistent casing (e.g., "Hello" vs "hello")
Punctuation attached to words (e.g., "world!")
Special characters and contractions (e.g., "don't", "U.S.A.")
Unknown or rare words
To handle these issues and perform effective tokenization, we can use a combination of text preprocessing techniques and regular expressions in Python. Here's an example code snippet that demonstrates this:
import re

UNK = '<unk>'  # Token for unknown words
EOS = '<eos>'  # Token for end of text

def tokenize(text, known_words):
    # Lowercase the text
    text = text.lower()

    # Split on whitespace and punctuation using regular expressions
    tokens = re.findall(r"\w+|[^\w\s]", text)

    # Replace unknown words with <unk> token
    tokens = [t if t in known_words else UNK for t in tokens]

    # Append <eos> token to the end of the text
    tokens.append(EOS)

    return tokens

# Example usage
text = "Hello, world! This is a sample sentence."
known_words = {'this', 'is', 'a', 'sample', 'sentence'}

print(tokenize(text, known_words))
['<unk>', '<unk>', '<unk>', '<unk>', 'this', 'is', 'a', 'sample', 'sentence', '<unk>', '<eos>']Let's break down the tokenization process step by step:
First, we convert the entire text to lowercase using
text.lower(). This ensures consistent casing across all words.Next, we use a regular expression
r"\w+|[^\w\s]"to split the text on whitespace and punctuation. The regex pattern\w+matches one or more word characters , while[^\w\s]matches any single character that is not a word character or whitespace. This effectively separates words and punctuation into individual tokens.We then replace any unknown words (i.e., words not in the
known_wordsset) with a special<unk>token. This helps the model handle out-of-vocabulary words gracefully during training and inference.Finally, we append an
<eos>token to the end of the tokenized text to mark the end of the sequence. This is useful for the model to learn when a text or document ends.
Understanding and Implementing Byte Pair Encoding
While the tokenization approach we discussed so far works well for many cases, it has some limitations. One major drawback is the handling of unknown or rare words. Replacing all uncommon words with a generic <unk> token can lead to loss of information and hinder the model's ability to understand the nuances of the text.

This is where Byte Pair Encoding (BPE) comes into play. BPE is a subword tokenization algorithm that iteratively builds a vocabulary of subword units based on their frequency in the training corpus. It starts with individual characters and progressively merges them into larger subword units until a desired vocabulary size is reached. This allows BPE to effectively handle out-of-vocabulary words by representing them as combinations of subword units.
Let's walk through a step-by-step example to better understand how BPE constructs its vocabulary. Imagine we have the following list of words:
['low', 'lower', 'newest', 'widest']Step 1: Initialization
BPE begins by splitting each word into individual characters and appending a special end-of-word symbol, typically denoted by </w>, to mark the end of each word. This initial segmentation looks like this:
['l o w</w>', 'l o w e r</w>', 'n e w e s t</w>', 'w i d e s t</w>']Step 2: Frequency Counting
Next, BPE counts the frequency of each character pair in the corpus. In this example, the most frequent pair is e followed by </w>, as it appears in two words: lower and newest:
Step 3: Merging
BPE merges the most frequent pair into a new subword unit. In our example, e</w> becomes a single unit i.e. considered as single token in vocabulary:
['l o w</w>', 'l o w e r</w>', 'n e w e s t</w>', 'w i d e s t</w>']Step 4: Iteration
The process of frequency counting and merging is repeated iteratively. In the next iteration, the most frequent pair is es followed by </w>, so they get merged:
['l o w</w>', 'l o w e r</w>', 'n e w es</w>', 'w i d es</w>']This iterative process continues until one of two conditions is met:
A desired vocabulary size is reached (e.g., 10,000 subword units).
No more frequent pairs are found (i.e., all possible merges have been performed).
The resulting set of subword units, along with their frequencies, forms the final BPE vocabulary. To further illustrate how BPE handles out-of-vocabulary words, let's consider an example. Suppose we have a BPE vocabulary that includes the subword units low, est, and </w>, but not the word lowest. When encountering lowest, BPE would break it down into the known subword units:
['low', 'est', '</w>']By representing lowest as a combination of subword units, BPE enables the model to process and generate words it hasn't seen during training.
Byte Pair Encoding in Python
Now, let's see how we can implement BPE in Python using the tiktoken library. tiktoken is an existing Python open source library (https://github.com/openai/tiktoken), which implements the BPE algorithm very efficiently based on source code in Rust. It can be installed as follows:
Now, let's see how we can implement BPE in Python using the tiktoken library:
pip install tiktokenimport tiktoken
# Load the BPE tokenizer
bpe_tokenizer = tiktoken.get_encoding("gpt2")
text = "This is an example of byte pair encoding! xhsbfubs"
# Tokenize the text using BPE
tokens = bpe_tokenizer.encode(text)
decoded = bpe_tokenizer.decode(tokens)
print(f"Encoded tokens: {tokens}")
print(f"Decoded text: {decoded}")
# Encoded tokens: [1212, 318, 281, 1672, 286, 18022, 5166, 21004, 0, # # 2124, 11994, 19881, 23161]
# Decoded text: This is an example of byte pair encoding! xhsbfubs
The tiktoken library provides an efficient implementation of the BPE algorithm used by OpenAI's GPT models. We first load the BPE tokenizer with tiktoken.get_encoding("gpt2"), which gives us access to the same tokenizer used by the GPT-2 model.
We then encode our text using bpe_tokenizer.encode(text), which applies the BPE algorithm and returns a list of token IDs. These IDs correspond to the subwords in the BPE vocabulary.
Finally, we can decode the token IDs back into the original text using bpe_tokenizer.decode(tokens). This demonstrates that BPE can effectively tokenize and reconstruct the text without losing information.
The real power of BPE lies in its ability to handle out-of-vocabulary words. Since it breaks down words into subwords, even if a word is not explicitly present in the vocabulary, it can still be represented by a combination of subwords. This allows the model to understand and generate words it hasn't seen during training. By understanding and implementing Byte Pair Encoding, you can take your text preprocessing to the next level and build more powerful and versatile language models.
Creating and Managing Sampling Windows
Now that we have our text data tokenized into a sequence of token IDs, the next step is to prepare it for training our language model. But how exactly do we feed this data to the model?
To answer that, let's first understand how language models like GPT learn. During training, the model tries to predict the next token in a sequence given the tokens that come before it. For example, if the input is "The cat sat on the", the model learns to predict the next most likely token, such as "mat" or "couch".
To facilitate this learning process, we need to create input-target pairs from our tokenized text. The input will be a sequence of tokens, and the target will be the next token that follows this sequence. We can generate these pairs using a technique called sampling windows. The sampling window is popularly also known as context length.
Imagine our tokenized text as a long ribbon. We take a small window of a fixed size (say, 50 tokens) and slide it over the ribbon. At each step, the tokens inside the window become our input, and the token immediately following the window becomes the target. We keep sliding the window until we reach the end of the ribbon.
Here's a visual representation:
[The, cat, sat, on, the, mat, ., <eos>]
 |   window 1    |
      |   window 2    |
           |   window 3    |
In window 1, the input is [The, cat, sat, on, the] and the target is mat. In window 2, the input is [cat, sat, on, the, mat] and the target is .. And so on.
By creating these sampling windows, we break down our long text into manageable sequences that the model can learn from. The size of the window is a hyperparameter that we can tune. A larger window allows the model to learn from more context, but it also increases the computational complexity.
Now, let's see how we can implement this in Python. We'll use PyTorch's Dataset and DataLoader classes to create an efficient data pipeline.
import torch
from torch.utils.data import Dataset, DataLoader

class TextDataset(Dataset):
    def __init__(self, tokens, window_size):
        # Store the tokenized text
        self.tokens = tokens
        # Store the size of the sampling window
        self.window_size = window_size

    def __len__(self):
        # Return the total number of sampling windows
        return len(self.tokens) - self.window_size

    def __getitem__(self, idx):
        # Get the input-target pair for the given index
        input_seq = self.tokens[idx:idx+self.window_size]  # Input sequence
        target_seq = self.tokens[idx+1:idx+self.window_size+1]  # Target sequence (shifted by 1)
        return torch.tensor(input_seq), torch.tensor(target_seq)

# Example usage
tokens = [1212, 318, 281, 1672, 286, 2419, 683, 26254, 0] # Tokenized text
dataset = TextDataset(tokens, window_size=5)  # Create a TextDataset with window size of 5
dataloader = DataLoader(dataset, batch_size=2, shuffle=True)  # Create a DataLoader with batch size of 2 and shuffling enabled

for inputs, targets in dataloader:
    print(inputs)  # Print the input sequences
    print(targets)  # Print the corresponding target sequences
    break  # Break after the first batch (for demonstration purposes)
tensor([[ 1672, 286, 2419, 683, 26254],
		[ 1212, 318, 281, 1672, 286]])

tensor([[ 286, 2419, 683, 26254, 0],
		[ 318, 281, 1672, 286, 2419]])
Let's break this down step by step:
We define a custom
TextDatasetclass that inherits from PyTorch'sDatasetclass. This class takes the tokenized text and the window size as input.The
__len__method returns the total number of sampling windows we can create from the tokenized text. We subtract the window size to avoid going out of bounds.The
__getitem__method is the heart of the dataset. It takes an indexidxand returns the input-target pair for the corresponding sampling window. The input istokens[idx:idx+window_size]and the target istokens[idx+1:idx+window_size+1], i.e., the input sequence shifted by one token.We then create an instance of the
TextDatasetwith our tokenized text and a window size of 5.We wrap the dataset in a
DataLoader, which allows us to batch the data and shuffle it for training. Here, we use a batch size of 2.Finally, we loop over the dataloader to get batches of input-target pairs. Each input is a tensor of shape
(batch_size, window_size), and each target is a tensor of shape(batch_size, window_size).
Now consider the following code which provides the best practice for creating datasets and dataloaders:
import torch
from torch.utils.data import Dataset, DataLoader

class GPTDataset(Dataset):
    def __init__(self, text, tokenizer, max_length, stride):
        self.input_ids = []
        self.target_ids = []

        # Tokenize entire text
        token_ids = tokenizer.encode(text)

        # Create overlapping sequences
        for i in range(0, len(token_ids) - max_length, stride):
            input_chunk = token_ids[i:i + max_length]
            target_chunk = token_ids[i + 1:i + max_length + 1]

            self.input_ids.append(torch.tensor(input_chunk))
            self.target_ids.append(torch.tensor(target_chunk))

    def __len__(self):
        return len(self.input_ids)

    def __getitem__(self, idx):
        return self.input_ids[idx], self.target_ids[idx]


def create_dataloader(text, batch_size=4, max_length=256, stride=128):
    """Create an efficient data loader for training"""
    tokenizer = tiktoken.get_encoding("gpt2")
    dataset = GPTDataset(text, tokenizer, max_length, stride)

    dataloader = DataLoader(
        dataset,
        batch_size=batch_size,
        shuffle=True,
        drop_last=True,
        num_workers=4,
        pin_memory=torch.cuda.is_available()
    )

    return dataloader
Building Token Embeddings from Scratch
So far, we've seen how to preprocess text data and convert it into sequences of token IDs using techniques like tokenization and Byte Pair Encoding. The next crucial step is to transform these discrete token IDs into continuous vector representations, known as embeddings.

Embeddings are dense, low-dimensional vectors that capture semantic and syntactic information about the tokens. By representing tokens as embeddings, we enable the language model to learn meaningful relationships and patterns in the text data.
In PyTorch, we can create embeddings using the nn.Embedding layer. This layer maps each token ID to a corresponding vector of a specified size.
Here's an example of how to create an embedding layer in PyTorch:
import torch
import torch.nn as nn

vocab_size = 10000  # Size of the vocabulary (number of unique tokens)
embed_size = 128  # Dimensionality of the embedding vectors

embedding_layer = nn.Embedding(vocab_size, embed_size)
In this code snippet, we define an embedding layer with a vocabulary size of 10,000 and an embedding size of 128. This means that each token ID will be mapped to a 128-dimensional vector.
To use the embedding layer, we simply pass the token IDs through it:
token_ids = torch.tensor([1, 2, 3, 4])  # Example token IDs
embeddings = embedding_layer(token_ids)

print(embeddings.shape)

# Output: torch.Size([4, 128])
Here, we pass a tensor of token IDs through the embedding layer, and it returns the corresponding embeddings. The resulting embeddings tensor has a shape of (4, 128), indicating that we have 4 tokens, each represented by a 128-dimensional vector.
But how does the embedding layer know what values to assign to each token's embedding vector? Initially, the embedding layer is randomly initialized. During the training process, the language model learns to adjust these embeddings based on the patterns and relationships in the text data.
However, the token embeddings each word independently, regardless of its position. This is where positional embeddings come in – they help the model understand where each word appears in the sequence.
Adding Positional Embeddings
The self-attention mechanism in transformer models is inherently position-agnostic. When looking at token embeddings alone, the model has no way to know whether "cat" appears at the beginning, middle, or end of the sentence. Positional embeddings solve this by adding position-specific information to each token embedding.
Think of it this way: if token embeddings tell us "what" the word is, positional embeddings tell us "where" it appears. When we combine them, the model gets both pieces of information simultaneously.
Implementing Positional Embeddings
Let's implement a complete embedding system that combines both token and positional embeddings. We choose max_sequence_length based on how long our input sequences might be:
# Define max_sequence_length as 512
max_sequence_length = 512

# Create positional embedding layer
position_embedding = nn.Embedding(max_sequence_length, embed_size)
Now, generate position indices for our sequence:
# If our token_ids has length 4, we need positions [0, 1, 2, 3]
positions = torch.arange(len(token_ids))
print(f"Position indices: {positions}")

# Output: Position indices: tensor([0, 1, 2, 3])
Now get the embeddings for these positions or indices:
# Get embeddings from position_embeddings layer
position_embeddings = position_embedding(positions)
print(f"Position embedding shape: {position_embeddings.shape}")

# Output: Position embedding shape: torch.Size([4, 128])
Now combine both token embeddings and positional embeddings:
combined_embeddings = embeddings + position_embeddings
print(f"Combined embedding shape: {combined_embeddings.shape}")

# Output: Combined embedding shape: torch.Size([4, 128])
Implementing Embeddings (Best Practise)
Let's implement a complete embedding system that combines both token and positional embeddings:
# Best practices implementation
class EmbeddingLayer(nn.Module):
    def __init__(self, vocab_size, embedding_dim, max_sequence_length):
        super().__init__()

        # Initialize embeddings with proper scaling
        self.token_embedding = nn.Embedding(vocab_size, embedding_dim)
        self.position_embedding = nn.Embedding(max_sequence_length, embedding_dim)

        # Initialize weights using normal distribution
        nn.init.normal_(self.token_embedding.weight, std=0.02)
        nn.init.normal_(self.position_embedding.weight, std=0.02)

    def forward(self, token_ids):
        # Apply scaling to token embeddings
        token_embeddings = self.token_embedding(token_ids) * self.scale

        # Create and cache position indices
        if not hasattr(self, '_position_ids'):
            self._position_ids = torch.arange(
                token_ids.size(1),
                device=token_ids.device
            )

        # Add positional embeddings
        return token_embeddings + self.position_embedding(self._position_ids)
Let's break down how this works:
Token Embeddings: Each word gets transformed into a dense vector through the
token_embeddinglayer, just as we discussed earlier.Position Numbers: We create a sequence of position indices (0, 1, 2, ...) for each position in our input sequence.
Position Embeddings: These indices get transformed into position-specific vectors through the
position_embeddinglayer.Combination: We add the token and positional embeddings together. This addition operation preserves both the meaning of the word (from token embeddings) and its position (from positional embeddings).
Wrapping Up
In this comprehensive guide, we've explored the fundamental building blocks of text preprocessing for language modeling. We started by diving into tokenization techniques, learning how to break down raw text into meaningful units while handling challenges like punctuation, casing, and special characters. Next, we discovered the power of Byte Pair Encoding (BPE) for creating subword vocabularies that effectively handle rare and unknown words. We then learned how to construct efficient sampling windows to prepare tokenized text for training, and finally, we built token embeddings from scratch using PyTorch, incorporating positional information to capture word order and context.
Remember, the techniques and concepts we've discussed are not just theoretical - they have practical applications in a wide range of natural language processing tasks, such as language translation, text summarization, sentiment analysis, and more. By mastering these fundamentals, you'll be equipped to tackle complex language modeling challenges and build impressive AI systems.
Thanks for reading NeuraForge: AI Unleashed!
If you enjoyed this deep dive into AI/ML concepts, please consider subscribing to our newsletter for more technical content and practical insights. Your support helps grow our community and keeps the learning going! Don't forget to share with peers who might find it valuable. 🧠✨